";inherits:false;initial-value:#0000}@property --tw-gradient-via{syntax:"";inherits:false;initial-value:#0000}@property --tw-gradient-to{syntax:"";inherits:false;initial-value:#0000}@property --tw-gradient-stops{syntax:"*";inherits:false}@property --tw-gradient-via-stops{syntax:"*";inherits:false}@property --tw-gradient-from-position{syntax:"";inherits:false;initial-value:0}@property --tw-gradient-via-position{syntax:"";inherits:false;initial-value:50%}@property --tw-gradient-to-position{syntax:"";inherits:false;initial-value:100%}@property --tw-leading{syntax:"*";inherits:false}@property --tw-font-weight{syntax:"*";inherits:false}@property --tw-shadow{syntax:"*";inherits:false;initial-value:0 0 #0000}@property --tw-shadow-color{syntax:"*";inherits:false}@property --tw-shadow-alpha{syntax:"";inherits:false;initial-value:100%}@property --tw-inset-shadow{syntax:"*";inherits:false;initial-value:0 0 #0000}@property --tw-inset-shadow-color{syntax:"*";inherits:false}@property --tw-inset-shadow-alpha{syntax:"";inherits:false;initial-value:100%}@property --tw-ring-color{syntax:"*";inherits:false}@property --tw-ring-shadow{syntax:"*";inherits:false;initial-value:0 0 #0000}@property --tw-inset-ring-color{syntax:"*";inherits:false}@property --tw-inset-ring-shadow{syntax:"*";inherits:false;initial-value:0 0 #0000}@property --tw-ring-inset{syntax:"*";inherits:false}@property --tw-ring-offset-width{syntax:"";inherits:false;initial-value:0}@property --tw-ring-offset-color{syntax:"*";inherits:false;initial-value:#fff}@property --tw-ring-offset-shadow{syntax:"*";inherits:false;initial-value:0 0 #0000}@property --tw-outline-style{syntax:"*";inherits:false;initial-value:solid}@property --tw-blur{syntax:"*";inherits:false}@property --tw-brightness{syntax:"*";inherits:false}@property --tw-contrast{syntax:"*";inherits:false}@property --tw-grayscale{syntax:"*";inherits:false}@property --tw-hue-rotate{syntax:"*";inherits:false}@property --tw-invert{syntax:"*";inherits:false}@property --tw-opacity{syntax:"*";inherits:false}@property --tw-saturate{syntax:"*";inherits:false}@property --tw-sepia{syntax:"*";inherits:false}@property --tw-drop-shadow{syntax:"*";inherits:false}@property --tw-drop-shadow-color{syntax:"*";inherits:false}@property --tw-drop-shadow-alpha{syntax:"";inherits:false;initial-value:100%}@property --tw-drop-shadow-size{syntax:"*";inherits:false}@property --tw-backdrop-blur{syntax:"*";inherits:false}@property --tw-backdrop-brightness{syntax:"*";inherits:false}@property --tw-backdrop-contrast{syntax:"*";inherits:false}@property --tw-backdrop-grayscale{syntax:"*";inherits:false}@property --tw-backdrop-hue-rotate{syntax:"*";inherits:false}@property --tw-backdrop-invert{syntax:"*";inherits:false}@property --tw-backdrop-opacity{syntax:"*";inherits:false}@property --tw-backdrop-saturate{syntax:"*";inherits:false}@property --tw-backdrop-sepia{syntax:"*";inherits:false}@property --tw-duration{syntax:"*";inherits:false}@property --tw-ease{syntax:"*";inherits:false}@property --tw-scale-x{syntax:"*";inherits:false;initial-value:1}@property --tw-scale-y{syntax:"*";inherits:false;initial-value:1}@property --tw-scale-z{syntax:"*";inherits:false;initial-value:1}@keyframes pulse{50%{opacity:.5}}
한국어
로그인 / 회원가입
keygold invite coupon신규 사용자 전용회원가입하고 할인 쿠폰 받기
keygold homekeygold arrow-right블로그keygold arrow-right위기협약 재등장: 저투자 유저도 고위험을 돌파할 수 있는 핵심 사고법
keygold search

위기협약 재등장: 저투자 유저도 고위험을 돌파할 수 있는 핵심 사고법

keygold blog author지우
2026/01/23
keygold facebook sharekeygold reddit sharekeygold twitter sharekeygold whatsapp share
keygold link

H1|위기협약 재등장: 저투자 유저도 고위험을 돌파할 수 있는 핵심 사고법

Arknights에서 위기협약(Crisis Contract) 은 처음부터 단순한 스펙 경쟁을 요구하는 콘텐츠가 아니었습니다.
이 모드는 오퍼레이터의 레벨보다도, 닥터가 스테이지의 의도와 리스크 설계를 얼마나 정확히 이해하는지를 시험하는 고난이도 콘텐츠로 설계되어 왔습니다.

많은 실패는 화력이 부족해서가 아닙니다.
대부분은 계약 조건을 잘못 해석한 것에서 시작됩니다.

이 글에서는 과도한 육성이나 비용 투자 없이도,
위기협약이 의도한 설계 논리를 바탕으로 저투자 유저가 안정적으로 클리어할 수 있는 사고 방식을 정리합니다.

14945.jpg

왜 위기협약은 어렵게 느껴질까

위기협약에 대한 가장 흔한 오해는,
이 콘텐츠가 DPS 체크 혹은 로스터 체크라는 생각입니다.

실제로는 대부분의 실패가
리스크 조건이 전달하려는 메시지를 제대로 읽지 못해서 발생합니다.

자주 보이는 오해 사례는 다음과 같습니다.

  • ‘적 공격력 +80%’를 보고 힐러만 무작정 늘리는 경우

  • ‘근접 / 원거리 배치 금지’를 보고 공략 자체를 포기하는 경우

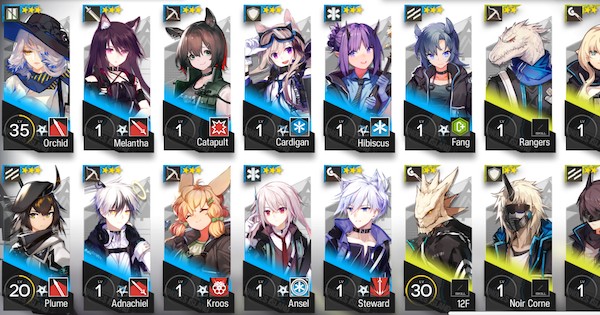
  • 맵 구조는 무시한 채 6성 오퍼레이터에만 의존하는 경우

위기협약은 플레이어에게
“스테이지를 힘으로 밀어라”라고 요구하지 않습니다.

대신 제한된 조건 안에서 해답을 찾아내라고 말합니다.

핵심 설계 원칙은 명확합니다.
리스크 조건은 흔히 쓰이는 해결책을 제거함으로써,
특정 유형의 해법으로 유도하도록 설계되어 있습니다.

이 구조를 이해하는 순간,
저투자 닥터에게도 위기협약은 훨씬 현실적인 콘텐츠가 됩니다.

저투자 클리어를 위한 3가지 핵심 원칙

1. 강화 수치보다 ‘금지된 요소’를 먼저 확인하라

버프는 압박을 설명합니다.
하지만 금지 조건은 해답을 드러냅니다.

예를 들면 다음과 같습니다.

  • 고지대 배치 금지 → 지형 활용, 이동 경로, 타이밍이 핵심

  • 저지 감소 또는 저지 불가 → 스킬, 위치 조정, 템포 조절이 핵심

무언가가 금지되어 있다면,
그것 없이도 클리어가 가능하도록 스테이지는 이미 설계되어 있습니다.

2. 수치형 오퍼레이터보다 ‘기능형 오퍼레이터’를 우선하라

저투자 편성에서는
순수 수치보다 기능적 역할이 훨씬 큰 가치를 가집니다.

특히 효과적인 역할은 다음과 같습니다.

  • 감속

  • 밀기 / 끌기

  • 군중 제어

  • 스킬 차단

이러한 오퍼레이터는 레벨보다 메커니즘에 의해 성능이 결정됩니다.
저레벨이라도 정확한 타이밍의 제어 스킬 하나가
비효율적인 고레벨 딜러보다 더 큰 역할을 합니다.

이 때문에 위기협약은
지속적인 Arknights 충전 에 의존하지 않아도 충분히 경쟁력이 유지됩니다.
투자보다 이해와 운용이 훨씬 중요하기 때문입니다.

3. 레벨보다 중요한 것은 스킬 타이밍

고위험 클리어 영상들을 보면 공통점이 있습니다.

  • 오퍼레이터 레벨은 중간 수준

  • 마스터리는 완성되지 않은 경우도 많음

  • 스킬 사용 타이밍은 매우 정교함

실패의 원인은 종종 단순합니다.

  • 스킬이 2초 늦었거나

  • 혹은 3초 빨랐을 뿐입니다

위기협약이 요구하는 것은
순수 화력이 아니라 다음과 같은 요소입니다.

  • 쿨타임 인식

  • 웨이브 구조 파악

  • 의도적인 스킬 순서 설계

무작정 밀어붙이는 플레이는 통하지 않습니다.

arknights-feature.jpg

저투자 유저에게 추천되는 필수 구성 요소

대부분의 저투자 클리어에서
다음 요소들은 매우 안정적인 기반이 됩니다.

  • 지속적인 감속 수단 1종 이상

  • 적의 행동을 끊을 수 있는 스킬 1종 이상

  • 지속 딜이 아닌 단일 폭발 딜 역할 1명 이상

이 구성은 시즌이 바뀌어도
다양한 리스크 조합에서 반복적으로 활용할 수 있습니다.

마무리: 위기협약의 본질

위기협약은 수치 검사가 아닙니다.
스테이지의 의도를 읽어내는 시험입니다.

막힌다면, 이유는 대부분 다음 중 하나입니다.

  • 오퍼레이터가 약해서가 아니라

  • 잘못된 문제를 풀고 있거나

  • 올바른 오퍼레이터를 잘못된 순간에 사용했거나

  • 계약이 의도적으로 제거한 요소를 무시하고 있기 때문입니다

리스크를 패널티가 아닌 설계 힌트로 보기 시작하면,
위기협약은 저자원 닥터에게도 충분히 공략 가능한 콘텐츠가 됩니다.

그리고 그것이 바로
이 모드가 의도한 플레이 방식입니다.

Arknights
49.99 선택 패키지
keygold sales291
keygold discount4.9
$36.97
-$13.02