";inherits:false;initial-value:#0000}@property --tw-gradient-via{syntax:"";inherits:false;initial-value:#0000}@property --tw-gradient-to{syntax:"";inherits:false;initial-value:#0000}@property --tw-gradient-stops{syntax:"*";inherits:false}@property --tw-gradient-via-stops{syntax:"*";inherits:false}@property --tw-gradient-from-position{syntax:"";inherits:false;initial-value:0}@property --tw-gradient-via-position{syntax:"";inherits:false;initial-value:50%}@property --tw-gradient-to-position{syntax:"";inherits:false;initial-value:100%}@property --tw-leading{syntax:"*";inherits:false}@property --tw-font-weight{syntax:"*";inherits:false}@property --tw-shadow{syntax:"*";inherits:false;initial-value:0 0 #0000}@property --tw-shadow-color{syntax:"*";inherits:false}@property --tw-shadow-alpha{syntax:"";inherits:false;initial-value:100%}@property --tw-inset-shadow{syntax:"*";inherits:false;initial-value:0 0 #0000}@property --tw-inset-shadow-color{syntax:"*";inherits:false}@property --tw-inset-shadow-alpha{syntax:"";inherits:false;initial-value:100%}@property --tw-ring-color{syntax:"*";inherits:false}@property --tw-ring-shadow{syntax:"*";inherits:false;initial-value:0 0 #0000}@property --tw-inset-ring-color{syntax:"*";inherits:false}@property --tw-inset-ring-shadow{syntax:"*";inherits:false;initial-value:0 0 #0000}@property --tw-ring-inset{syntax:"*";inherits:false}@property --tw-ring-offset-width{syntax:"";inherits:false;initial-value:0}@property --tw-ring-offset-color{syntax:"*";inherits:false;initial-value:#fff}@property --tw-ring-offset-shadow{syntax:"*";inherits:false;initial-value:0 0 #0000}@property --tw-outline-style{syntax:"*";inherits:false;initial-value:solid}@property --tw-blur{syntax:"*";inherits:false}@property --tw-brightness{syntax:"*";inherits:false}@property --tw-contrast{syntax:"*";inherits:false}@property --tw-grayscale{syntax:"*";inherits:false}@property --tw-hue-rotate{syntax:"*";inherits:false}@property --tw-invert{syntax:"*";inherits:false}@property --tw-opacity{syntax:"*";inherits:false}@property --tw-saturate{syntax:"*";inherits:false}@property --tw-sepia{syntax:"*";inherits:false}@property --tw-drop-shadow{syntax:"*";inherits:false}@property --tw-drop-shadow-color{syntax:"*";inherits:false}@property --tw-drop-shadow-alpha{syntax:"";inherits:false;initial-value:100%}@property --tw-drop-shadow-size{syntax:"*";inherits:false}@property --tw-backdrop-blur{syntax:"*";inherits:false}@property --tw-backdrop-brightness{syntax:"*";inherits:false}@property --tw-backdrop-contrast{syntax:"*";inherits:false}@property --tw-backdrop-grayscale{syntax:"*";inherits:false}@property --tw-backdrop-hue-rotate{syntax:"*";inherits:false}@property --tw-backdrop-invert{syntax:"*";inherits:false}@property --tw-backdrop-opacity{syntax:"*";inherits:false}@property --tw-backdrop-saturate{syntax:"*";inherits:false}@property --tw-backdrop-sepia{syntax:"*";inherits:false}@property --tw-duration{syntax:"*";inherits:false}@property --tw-ease{syntax:"*";inherits:false}@property --tw-scale-x{syntax:"*";inherits:false;initial-value:1}@property --tw-scale-y{syntax:"*";inherits:false;initial-value:1}@property --tw-scale-z{syntax:"*";inherits:false;initial-value:1}@keyframes pulse{50%{opacity:.5}}
한국어
로그인 / 회원가입
keygold invite coupon신규 사용자 전용회원가입하고 할인 쿠폰 받기
keygold homekeygold arrow-right블로그keygold arrow-right발로란트 초보자 가이드: 총싸움에서 계속 지는 이유 (에임 때문이 아닙니다)
keygold search

발로란트 초보자 가이드: 총싸움에서 계속 지는 이유 (에임 때문이 아닙니다)

keygold blog author민준
2026/01/09
keygold facebook sharekeygold reddit sharekeygold twitter sharekeygold whatsapp share
keygold link


발로란트를 막 시작했다면, 이런 경험 한 번쯤은 해봤을 겁니다.

적을 먼저 발견했고, 크로스헤어도 가슴에 정확히 올려놨고, 먼저 쐈는데…

결과 화면에서는 내가 먼저 죽어 있습니다.

대부분 이럴 때 이렇게 생각하죠.

“내 에임이 진짜 별로인가 보다.”

하지만 발로란트 같은 전술 FPS에서는, 총알이 발사되기 전 이미 승부가 결정되는 경우가 훨씬 많습니다.

에임은 긴 판단 과정의 마지막 단계일 뿐입니다.

계속해서 1대1 교전에서 진다면, 그 이유는 보이지 않는 기본 요소들에 있을 가능성이 큽니다.


1. “공평한 싸움”을 찾고 있다

일반 FPS에서는 공평한 1대1 싸움이 기본입니다.

하지만 발로란트에서 공평한 교전은 실수입니다.

프로들은 반응 속도로 싸우지 않습니다.

그들은 각도 이점(Angle Advantage) 으로 싸웁니다.

죽음의 기하학

벽에 바짝 붙어서 피킹할 때,

상대가 같은 코너에서 조금 떨어져 있다면

상대는 당신의 어깨를 먼저 보고,

당신은 상대 얼굴을 보기 전에 이미 맞습니다.

해결 방법

유틸리티 없이 각을 여는 ‘드라이 피킹’을 하지 마세요.

포지션, 팀원 지원, 플래시·연막·드론 등으로
유리한 싸움만 선택해야 합니다.


2. 플릭 샷보다 중요한 건 크로스헤어 위치

초보자들은 종종 “에임 괴물” 하이라이트 영상을 보고

180도 플릭이 필요하다고 생각합니다.

현실은 다릅니다.

고랭크 교전 대부분은 마우스를 거의 움직이지 않습니다.

프리 에임(Pre-aim)

잘하는 플레이어는 반응하지 않습니다. 예측합니다.

항상 머리 높이에 크로스헤어를 두고

적이 나올 위치에 미리 맞춰두면

필요한 건 클릭 한 번뿐입니다.

바닥을 보지 마세요

크로스헤어가 바닥이나 가슴에 있으면

매번 100ms 이상을 추가로 소비하게 됩니다.

이 차이가 생존과 사망을 가릅니다.


3. 데드존과 이동 오차

발로란트는 이동 중 사격을 극도로 처벌합니다.

아주 미세한 관성만 있어도 탄은 위로 튑니다.

함정

멈췄다고 생각해도 실제로는 감속 중인 경우가 많습니다.

카운터 스트레이핑(반대 방향 키를 짧게 눌러 즉시 정지)을

익히지 못하면 정확도는 계속 망가집니다.


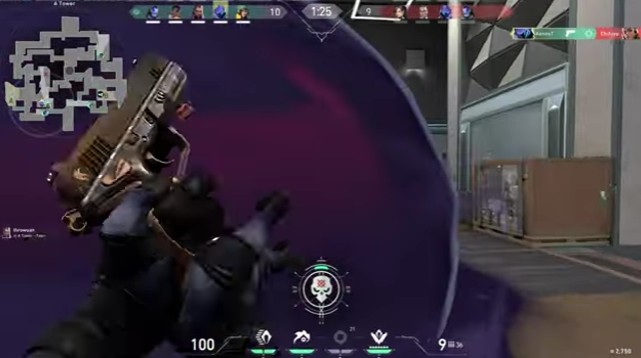
설정에서 ‘이동 오차 그래프’를 켜세요.

사격 시 파란 막대가 보인다면

문제는 에임이 아니라 움직임입니다.


4. 장비 착각: 과금보다 중요한 건 게임 이해도

새 마우스, 240Hz 모니터,

혹은 소리 좋은 밴달 스킨을 사기 위한 VP 충전(과금)

실력을 올려줄 것처럼 느껴질 수 있습니다.

물론 스킨 구매나 과금은

자신감을 높이고 게임을 더 즐겁게 만들 수 있습니다.

하지만 기본적인 판단력 부족은 절대 해결해주지 않습니다.

所谓 ‘스킨 버프’는 심리적 효과일 뿐,

진짜 실력 버프는 여기서 옵니다.

  • 정보 수집: 드론, 플래시, 리콘으로 코너 확인
  • 트리거 절제: 언제 쏘지 말아야 하는지 아는 것


5. 패닉 스프레이 vs 컨트롤 버스트

기습을 당하면 초보자는 마우스를 누른 채 기도합니다.

하지만 발로란트는 몇 발 이후 반동이 랜덤해집니다.

해결 방법

버스트 사격을 연습하세요.

2~3발 → 짧은 스트레이프 → 정지 → 다시 사격

이 방식은 정확도를 유지하면서

가만히 앉아 스프레이하는 상대보다 훨씬 생존력이 높습니다.


결론

당신이 지는 이유는 손이 느려서가 아닙니다.
위험한 교전을 너무 자주 선택하기 때문입니다.

포지셔닝, 크로스헤어 관리, 유틸리티 활용을 우선하면

에임이 갑자기 좋아진 것처럼 느껴질 겁니다.

사실은 쉬운 샷만 만들었을 뿐입니다.

원하신다면

연습장(The Range)에서 하루 15분으로

이동·프리 에임을 개선하는 구체적인 루틴도 만들어드릴게요.

발로란트
7400 포인트
keygold sales201
keygold discount4.9
$52.94
-$17.04