Honkai: Star Rail Top Up
 100% Safe Transaction
 24/7 Support
 Full Refund Guarantee
- All-In-One Bundle
- 60 Oneiric Shard
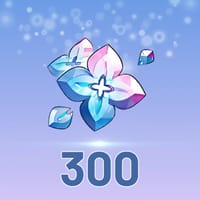
- 300+30 Oneiric Shard
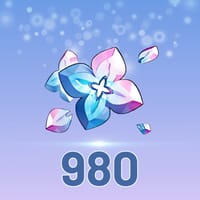
- 980+110 Oneiric Shard
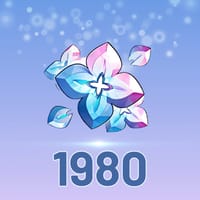
- 1980+260 Oneiric Shard
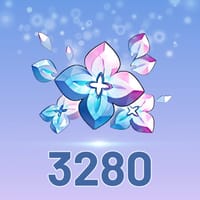
- 3280+600 Oneiric Shard
- 6480+1600 Oneiric Shard
- 6480+1600 Oneiric Shard*3
- 6480+1600 Oneiric Shard*5
- 6480+1600 Oneiric Shard*10
- Express Supply Pass
Top-up Instructions
KeyGold tops up Oneiric Shards and the Express Supply Pass directly inside your HoYoverse account, at 15–30% below the in-game price. The purchase goes through the shop in your own account, so the first-purchase double bonus, event rewards and Nameless Honor progress all apply exactly as they would if you paid yourself. Most orders are delivered in 5 to 30 minutes.
| Price | 15–30% less than in-game |
| Top-up method | Account login top-up |
| What you provide | HoYoverse Account email, password, server |
| Servers supported | America, Europe, Asia, TW-HK-MO |
| In-game bonuses | All applied, same as a self-purchase |
| Delivery time | 5–30 minutes, 24/7 |
How to Top Up Honkai: Star Rail on KeyGold
- Pick the Oneiric Shard pack or the Express Supply Pass you want and click Buy Now.
- At checkout, fill in your HoYoverse Account email, your password, and the server your Trailblazer is on — America, Europe, Asia or TW-HK-MO.
- Choose a payment method and complete the payment.
- Our team signs in, buys the item in the in-game shop, and signs out. You get a confirmation email the moment it lands.
Why Is It Cheaper Than Topping Up In-Game?
You pay KeyGold 15–30% less than the in-game shop charges, and you receive the identical item in the identical way. The saving is on our side of the transaction — nothing about the purchase inside your account is different.
This is also why the top-up is not a redeem code or a gift link. Codes come from separate stock and often miss out on in-game promotions. An account top-up is the real thing, bought in your shop, on your account.
Do I Still Get the First-Time Double Oneiric Shards?
Yes. The order is placed through the normal in-game shop on your account, so any tier you have not bought before still doubles, any promotion running at the time still applies, and the 300 Oneiric Shards that come with the Express Supply Pass arrive as usual. Whatever the shop shows you, you get.
Where Do I Find My HoYoverse Account Email?
- Open Honkai: Star Rail and tap the menu in the top-left corner, then open Account.
- The address shown next to HoYoverse Account is the one to enter at checkout. Your UID and server are on the same screen.
If you normally sign in with Google, Apple or another third-party account, open your HoYoverse account settings first and set an email and password for it. We can only process orders with an email-and-password login.
How Long Does a Honkai: Star Rail Top-Up Take?
Most orders are finished in 5 to 30 minutes. Orders placed right after a new Warp banner goes live can take a little longer because the queue is busier, and our team works around the clock, so there is no cut-off time. You can follow the status in Order Record at any point, and our live chat is staffed 24/7 if you want an update.
Is It Safe to Top Up This Way?
Your login details are used only to complete the order you paid for, and nothing else on the account is touched. To keep everything clean on your side:
- Two-step verification: keep your inbox open so you can send us the code within 5 minutes. You can also turn verification off before ordering and switch it back on once the items arrive.
- Stay logged out of the game while the order is processing — Honkai: Star Rail only allows one active session per account.
- Change your password after delivery. It takes a few seconds and nothing about your order is affected.
Check your email, password and server once more before you pay — a typo is the single most common reason an order gets held up. Not sure about something? Ask us in live chat before ordering.
Honkai: Star Rail Top Up: Oneiric Shards & Express Supply Pass
KeyGold tops up Honkai: Star Rail at 15–30% below the in-game price, on all four servers — America, Europe, Asia and TW-HK-MO. Because we buy the item through the shop inside your own account, the first-purchase double bonus, event rewards and Nameless Honor progress all count exactly as they would if you paid yourself.
Why Trailblazers Top Up With KeyGold
- You pay 15–30% less for the identical item, delivered the identical way.
- Every in-game bonus still counts. This is a real shop purchase on your account, not a redeem code from separate stock.
- 5–30 minutes, around the clock. Banner just dropped at 3am? There is still someone on shift.
- All four servers supported, with payment methods for players in every region we serve.
- Live chat staffed 24/7 — a real person, before and after you order.
Oneiric Shard Packages and the First-Purchase Bonus
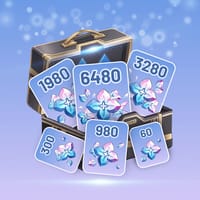
Honkai: Star Rail sells Oneiric Shards in six tiers. The first time you buy any given tier, the amount is doubled — and that bonus is per tier, so a Trailblazer who has only ever bought the 980 pack still has five doubles waiting. Ordering through KeyGold does not consume or change this in any way.
| Package | First-time total | Warps |
|---|---|---|
| 60 | 120 | 0 |
| 300 | 600 | 3 |
| 980 | 1,960 | 12 |
| 1,980 | 3,960 | 24 |
| 3,280 | 6,560 | 41 |
| 6,480 | 12,960 | 81 |
Oneiric Shards convert to Stellar Jade one for one, and a single Warp costs 160 Stellar Jade. The Warps column assumes the doubled first-time amount, converted in full. For reference, a guaranteed rate-up 5-star on a Character Event Warp takes at most 180 pulls, which is roughly the 6,480 tier bought twice.
Is the Express Supply Pass Worth It?
The Express Supply Pass costs the same as the 300 Oneiric Shard tier and pays out 300 Oneiric Shards the moment it activates, then 90 Stellar Jade every day for 30 days. That is 3,000 Stellar Jade in total — around 18 Warps — for the price of a pack that would otherwise give you 300.
Two things worth knowing before you buy it. The daily 90 Stellar Jade have to be claimed by opening the game, so a week away means a week of Stellar Jade lost. And multiple passes stack in duration rather than in rate: buying three extends the timer to 90 days, it does not pay 270 a day.
If you log in most days, it is the best value per dollar in the game. If you play in bursts around banners, an Oneiric Shard pack with an unused first-purchase double will get you more pulls for the same money. Plenty of players do both — the pass for the daily trickle, shards when a banner they want shows up.
What You Can Spend It On
Stellar Jade goes toward Star Rail Special Passes for the Character and Light Cone Event Warps, Star Rail Passes for the standard Stellar Warp, and Trailblaze Power refills when you are farming Relics or Trace materials. Character outfits work differently — they are bought with Oneiric Shards directly, without converting to Stellar Jade first, so it is worth leaving a balance untouched if an outfit you want is on the way.
About Honkai: Star Rail
Honkai: Star Rail is a turn-based sci-fi RPG from HoYoverse, playable on PC, mobile and PlayStation with shared progress across all three. You board the Astral Express as the Trailblazer and travel between worlds, each with its own civilisation and its own crisis, building a team from a roster that grows with every version. Characters and Light Cones come mainly from limited-time Warp banners, which is why most players time their top-ups around a banner they care about.
Honkai: Star Rail Top-Up FAQ
Will I still get the first-purchase double bonus?
Yes. The order is placed through the standard in-game shop on your account, so any tier you have not bought before still doubles, and any promotion running at the time still applies.
What's the difference between Oneiric Shards and Stellar Jade?
Oneiric Shards are the paid currency you buy; Stellar Jade is what you actually spend on Warps. Shards convert to Stellar Jade one for one, and you can also earn Stellar Jade through gameplay. A few things — character outfits, for instance — are paid for in Oneiric Shards directly, so converting your whole balance straight away is not always the right call.
What are Star Rail Passes and Star Rail Special Passes?
Both are Warp tickets. Star Rail Passes are for the permanent Stellar Warp, where standard characters and Light Cones appear. Star Rail Special Passes are for the limited Character Event and Light Cone Event Warps, which is where time-limited 5-stars live. You buy either with Stellar Jade at 160 apiece, or exchange for them with Undying Starlight and Undying Embers.
Which servers do you support?
All four: America, Europe, Asia and TW-HK-MO. Select yours at checkout. Oneiric Shards are bound to the account and server they were bought on and cannot be moved between servers afterwards, so make sure the one you pick matches the account you actually play.
How fast is delivery?
Typically 5 to 30 minutes, at any hour. The queue runs longer in the first hours after a new Warp banner goes live. You can check progress in Order Record, and live chat can tell you where your order sits.
Is it safe to buy a Honkai: Star Rail top-up online?
Your details are used only to complete the order you paid for. Keep your inbox handy for a verification code, stay logged out while the order runs, and change your password once the items land — the full checklist is in the top-up instructions above.