

Neverness to Everness: The Ultimate Lacrimosa Build Guide (V1.1 Meta)
 Avery Wilson


Looking to unlock Lacrimosa's full DPS potential in Neverness to Everness? This hardcore guide breaks down her strict 3-second Nightmare uptime, optimal quick-swap team compositions (including the Hexed Cycle meta), and end-game skill attributes to help you dominate the current meta.
If you’ve been keeping up with the official teasers for Neverness to Everness (NTE), you probably already know Lacrimosa as the eccentric girl from the Bureau of Anomaly Control’s Executional Tactical Squad 4 (ETD-4) who loves shaking vending machines to hoard tomato juice. But don't let her goofy, caffeine-deprived demeanor fool you. In the current Version 1.1 meta, she has solidified her spot as an absolute powerhouse.
As the game’s very first limited S-Class Esper featuring a Chaos attribute and a Liquid arc type, Lacrimosa completely rewrites the rules of engagement. She isn't just another brainless stat-stick that wins by raw numbers. Instead, she operates as an incredibly high-skill-ceiling, on-field carry and shield-breaker whose entire damage output revolves around dual-form basic attack swapping and strict management of short-duration DoT (Damage over Time) detonations. If you want a character that rewards precise mechanical execution and melts high-difficulty anomalies, Lacrimosa is your go-to T0 carry.
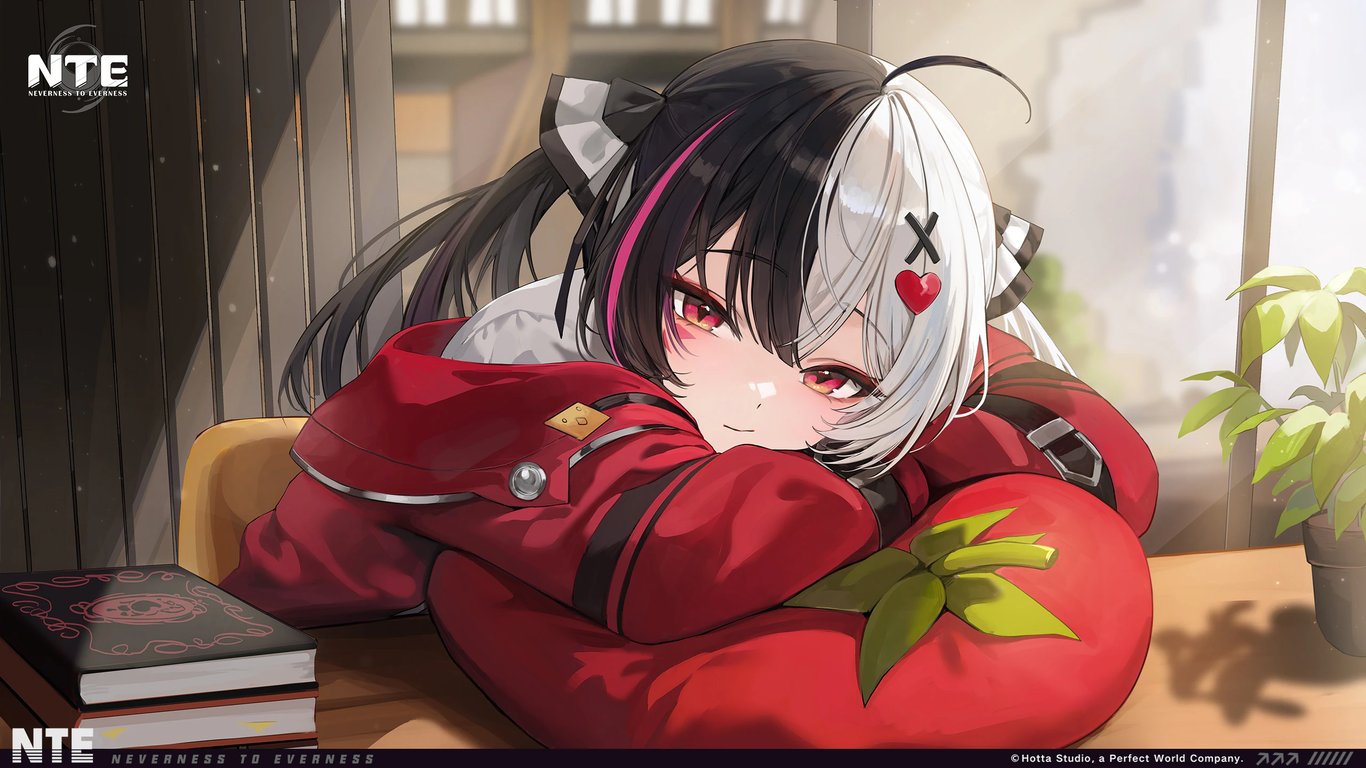
Lacrimosa's Multipliers
To truly maximize Lacrimosa’s kit, we have to look past the superficial day-one guides and dive straight into the hard data sourced from the official Wiki. Her playstyle is deeply dynamic, and understanding her frame data and hidden multipliers is key to unlocking her full potential.
The Dual-Form Normal Attacks
Lacrimosa’s defining feature is her stance-dancing mechanic. By tapping the Aim key, she seamlessly toggles between two entirely distinct basic attack styles:
- Tomato Metal (Melee/Wok Stance): A close-quarters physical sequence where she swings her frying wok, offering high stagger values and excellent defensive tracking.
- Tomato Percussion (Ranged/Gummy Stance): A mid-range zoning sequence where she flings explosive red jelly projectiles to chip away at enemy shield bars from a safe distance.
A common trap many players fall into is overthinking which stance yields higher raw DPS. The reality? According to official data, both sequences share almost identical frame-to-damage ratios. The dual-form design is fundamentally utility-driven. Use Tomato Percussion to maintain uptime while dodging lethal boss point-blank AoEs, then swap to Tomato Metal when you need aggressive forward momentum and tighter hitbox grouping.
The Nightmare DoT Mechanics
This is where her damage engine lies. Every single hit from Lacrimosa’s basic attacks, skills, and ultimate applies a stack of the Nightmare status to her targets, capping out at 10 stacks. This inflicts continuous, ticking Chaos damage that scales directly with her attack power.
However, her true hidden power—and something many early third-party theorycrafters completely missed—is that the Nightmare DoT features a hard-coded, fixed 50% Crit Rate. No matter how low your character sheet's Crit Rate is, her DoTs will always critically strike exactly half the time. This completely flips traditional gear progression on its head. Instead of aggressively chasing standard 1:2 Crit ratios on your equipment, you can ignore the standard Crit Rate baseline and funnel your stats directly into raw Attack and Crit Damage multipliers to achieve astronomical numbers.
Active Skill & The "Mimicry" Tech
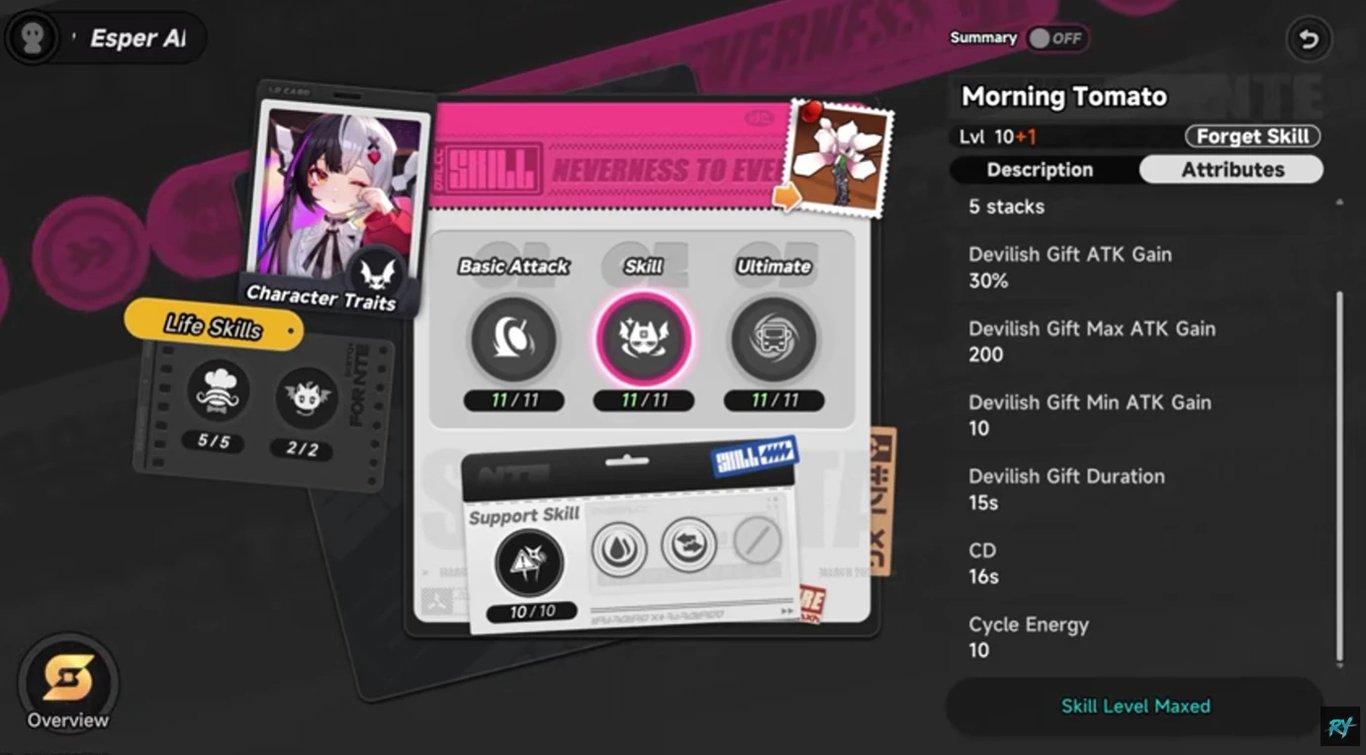
Her Combat Skill, Morning Tomato, is a heavy-hitting AoE slap that applies multiple stacks of her signature DoT instantly. However, holding down the skill trigger activates her unique mimicry trait: Devilish Inspiration. This allows Lacrimosa to literally copy and steal specific skills from active anomalies or bosses on the field.
do not rely on long-press mimicry during sweaty, high-difficulty endgame runs. Many of these stolen anomaly animations suffer from severe wind-up delays and lock Lacrimosa into lengthy, uncancelable animations. If you get stuck in a 3-second monster animation during an aggressive boss phase, you will completely ruin your rotation alignment and likely get one-shotted. Keep it quick, stick to short taps, and only mimic when you are absolutely certain you have a safe DPS window.
Best Gear Setups: Drives & Stats Priority
Building Lacrimosa requires a precise understanding of how her fixed DoT mechanics interact with your gear slots.
Best Arcs (Weapons)
- Top Tier (Best in Slot) — The Last Rose: Her signature 5-Star Arc is irreplaceable. It boasts the highest base attack stat in the game for Chaos characters and provides an unconditional boost to Crit Damage whenever a DoT ticks. More importantly, its unique passive grants a massive bonus: whenever you attack a Broken (shield-depleted) enemy, it automatically extends their stagger/break window by an additional 3 seconds. For a burst carry like Lacrimosa, this extra 3-second window is the difference between a clean phase-skip and a messy fight.
- F2P Alternative — Crimson Cadence (4-Star): A solid free-to-play option that can be obtained through standard progression or the faction shop. It gives a flat Attack percentage boost and slightly increases energy generation upon triggering an elemental reaction. While it performs well enough for general world content, the lack of the 3-second stagger extension means your total burst windows will be significantly tighter compared to a signature-wielding setup.
Drive Discs & Module Optimization
According to early data analysis from Icy-Veins' early theorycrafting, her optimal setup revolves around maximizing elemental damage scaling over raw flat stats.
- Set Setup: Run a 2-Piece Diabolos set combined with high-tier Type III Modules on your console layout.
- The Logic: Each optimized Type III Module provides a flat 10% bonus to Chaos damage. By carefully configuring your console to stack these modules alongside the Diabolos 2-piece set bonus, you can easily reach an absolute ceiling of +40% Chaos DMG. Because DoT scales aggressively with elemental damage modifiers, this layout vastly outperforms generic attack-set alternatives.
Stats Priority
Keep your eyes peeled for these specific rolls on your primary and sub-stats:
- Main Stats: Chaos DMG Bonus (Console/Cup) / ATK% (Drive) / Crit DMG (Headpiece)
- Sub-stats Priority: DoT DMG > ATK% > Crit DMG > Energy Recharge > Crit Rate
Note: Because of her innate 50% fixed Crit Rate on her main source of damage, Crit Rate rolls drop significantly in value. Focus entirely on pushing your Crit DMG and Attack percentages to the absolute limit.
Best Team Setup for Lacrimosa
To unlock Lacrimosa's full T0 potential, her teammates must fulfill two non-negotiable roles: rapid 「Anomaly」 shield shredding and off-field DoT multiplier stacking.
1. Premium Team
According to the latest tier list, this premium composition stands at the absolute top of the V1.1 endgame meta. It is an uncompromising hyper-carry lineup designed to squeeze every single drop of DPS out of Lacrimosa’s kit.
Lacrimosa(Main Carry) + Sakiri(DoT Buffer) + Fadia(Shielder) + Daffodill (Breaker)
- Lacrimosa (Main DPS): Stays on the field during the break window to output maximum sustained Chaos field damage.
- Sakiri (DoT Buffer): The backbone of the team's scaling. Her unique passive increases the team's total DoT multiplier by 25% for every unique DoT status active on the field (up to a massive 100% cap). However, Sakiri suffers from notoriously poor Esper Meter build-up, meaning she cannot generate her ultimate reliably if left on the field.
- Fadia (Pseudo Shielder & Nova Enabler): Keeps the squishy carry alive with sturdy shields. Fadia features an incredibly rapid Esper Meter build-up, allowing her to spam abilities and trigger team-wide Nova bursts consistently.
- Daffodill (Breaker & Passive Trigger): Her sole job is to obliterate enemy shield gauges. The faster Daffodill forces a boss into a Broken state, the faster Lacrimosa can swap in to cash in on her massive passive modifiers.
Elemental Rotation: The synergy here is flawless. By rapidly swapping back and forth between Lacrimosa and Sakiri, you instantly trigger the Scorch reaction. This dual-application completely bypasses Sakiri's poor energy generation, keeping the field permanently melting under a blanket of mixed Chaos and Incantation debuffs.
2. Hexed Cycle Setup
If you prefer a fast-paced, high-APM playstyle that rejects the standard selfish-carry meta, this quick-swap variant completely subverts traditional team rotations.
- Roster: Lacrimosa + Sakiri + Nanally + Zero
- The Rotation Mechanics: Instead of playing Lacrimosa as a traditional selfish hyper-carry, this team utilizes her primarily as an off-field enabler to initiate the Hexed Cycle Reaction. Lacrimosa quickly takes the field, drops her Combat Skill and a fast combo to instantly apply maximum Nightmare stacks, and immediately swaps out.
- The Synergy: Nanally and Zero then enter the field to drop their respective payloads, weaving Scorch Cycle Reactions into Lacrimosa's lingering Chaos ticks. The resulting chain reaction triggers a rapid cascade of overlapping elemental detonations, offering immense burst potential without relying on extended basic attack animations.
3. F2P Team
For players who are saving their premium currency or missed out on limited 5-star banners, Lacrimosa is incredibly accommodating to budget rosters.
- Roster: Lacrimosa + Adler + Haniel + Flex Slot
- The Budget Logic: Because Chaos is one of the rarest elements sitting at the absolute bottom of the Esper Circle, building a budget team around her is surprisingly easy. She automatically fulfills the hardest elemental requirement by herself.
- Haniel acts as your dedicated Psyche slot buffer, providing an easy-to-use, flat attack damage increase to the whole team. Adler steps in to handle team survivability while perfectly filling the Incantation requirement. The fourth slot is completely flexible—throw in any standard S-Class character you happen to pull down the line.
- The Verdict: Your overall reaction speed will be noticeably slower, and Lacrimosa won't trigger her maximum passive window quite as frequently as she would in a premium core. However, the core mechanical synergy remains intact, making this a highly effective baseline setup.
Is Pulling Copies Worth It?
As verified by data from deep-dive repository networks, hunting for duplicate copies of Lacrimosa focuses heavily on unlocking mechanical fluidity and quality-of-life adjustments rather than merely injecting raw, bloated stat increases. For players looking to secure these high-value milestones, evaluating a budget-friendly Neverness to Everness top up for extra premium currency is the most direct path to accelerating her vertical progression.
A1 (Clock Out Clemency) — The Sweet Spot
If you have the spare resources, stopping here offers the highest value for your investment. A1 increases the baseline damage scaling of her ticking Nightmare debuff by a flat 50%. This milestone provides a massive spike in on-field DPS for a minimal resource cost, making it the absolute prime threshold for light spenders looking to optimize their account value.
A3 (Instant Detonation)
This node fundamentally alters her combat cadence. It enables her fifth basic attack sequence to instantly detonate all remaining active status stacks on a target for a massive burst of chunk damage, completely bypassing the standard tick-down timer. By converting sustained damage into instant burst, A3 significantly shortens her required field time and improves your overall rotation speed.
A6 (Infinite Nightmare)
This final upgrade is reserved for dedicated high-investment accounts. A6 completely removes her energy regeneration bottlenecks and allows her Ultimate to automatically refresh her primary skill cooldowns. It transforms Lacrimosa into an unstoppable, self-sustaining loop of constant Chaos application, unlocking the absolute peak ceiling of her kit.
Combat Strategy & Rotation: Maximizing the 3-Second Window
The absolute hardest part about mastering Lacrimosa is dealing with her strict mechanical uptime. According to the official Wiki database, her Nightmare DoT has a base duration of only 3 seconds. If you mess up your positioning or lag during your character swaps, your stacks will drop, and your DPS will plummet.
To prevent this clunkiness—a common complaint brought up by casual players on Mobalytics boards—you need to execute a clean, optimized rotation that prioritizes her defensive counters over raw basic attack spam.
Step-by-Step Rotation:
- Prep the Field: Start with your off-field supports. Drop Adler’s skill or setup Baicang/Sakiri’s脱手 (off-field) ultimates to establish your baseline attribute debuffs.
- The Cheat Code (Dodge Counter): Swap Lacrimosa in, but do not start blindly hammering away at your basic attack sequence. Instead, fish for an enemy attack and execute a perfect Dodge Counter. The official Wiki data confirms that her Dodge Counter features a massive, forgiving hitbox and instantly applies 6 stacks of Nightmare in a single hit. This saves you from having to execute two full basic attack combos just to build your setup.
- The Burst: Immediately cancel the recovery frames of your Dodge Counter by tapping her Combat Skill (Morning Tomato), then execute her 5th-string basic attack. This will top off your target at a maximum of 10 stacks within a fraction of a second.
- The Swap-Cancel Tech: Pop her Ultimate. If you choose to use her mimicry skill during this window, utilize advanced swap-canceling. The moment the mimicry animation locks in, immediately swap to your sub-DPS characters to refresh their buffs, then snap back to Lacrimosa. Her lingering active field presence will continue to tick, maximizing your damage output during that tight 3-second window.

Conclusion & Final Pull Advice
Lacrimosa is an exceptional addition to the Neverness to Everness Version 1.1 roster. Her 3-second DoT maintenance window and animation-locked mimicry mechanics mean she can feel slightly clunky or overwhelming for casual button-mashers. However, if you take the time to practice her dodge counters and manage her stance-swapping utility, her mechanical ceiling is unmatched. She provides a future-proof solution for breaking tough boss shields and stands as a premier pick for any account looking to dominate endgame content.
If you are looking to quickly optimize your account, secure her signature weapon (The Last Rose), or grab her exclusive premium outfit (Nightingale’s Crescendo), you can always stock up on your Annuliths or Rift Crystals safely and instantly via keygold.gg to keep your roster ahead of the curve.











![[NTE] Iroi Guide | Best-In-Slot (BiS) Shinku Genesis Team Comp & Character Build Guide](https://img.keygold.gg/cdn-cgi/imagedelivery/YiOyiAditmsufk6Ngg5iSw/73d27997-4d0f-41cd-fe6f-463fe7bbb600/w=192,h=128,fit=cover,q=80,metadata=none,format=auto)