";inherits:false;initial-value:#0000}@property --tw-gradient-via{syntax:"";inherits:false;initial-value:#0000}@property --tw-gradient-to{syntax:"";inherits:false;initial-value:#0000}@property --tw-gradient-stops{syntax:"*";inherits:false}@property --tw-gradient-via-stops{syntax:"*";inherits:false}@property --tw-gradient-from-position{syntax:"";inherits:false;initial-value:0}@property --tw-gradient-via-position{syntax:"";inherits:false;initial-value:50%}@property --tw-gradient-to-position{syntax:"";inherits:false;initial-value:100%}@property --tw-leading{syntax:"*";inherits:false}@property --tw-font-weight{syntax:"*";inherits:false}@property --tw-shadow{syntax:"*";inherits:false;initial-value:0 0 #0000}@property --tw-shadow-color{syntax:"*";inherits:false}@property --tw-shadow-alpha{syntax:"";inherits:false;initial-value:100%}@property --tw-inset-shadow{syntax:"*";inherits:false;initial-value:0 0 #0000}@property --tw-inset-shadow-color{syntax:"*";inherits:false}@property --tw-inset-shadow-alpha{syntax:"";inherits:false;initial-value:100%}@property --tw-ring-color{syntax:"*";inherits:false}@property --tw-ring-shadow{syntax:"*";inherits:false;initial-value:0 0 #0000}@property --tw-inset-ring-color{syntax:"*";inherits:false}@property --tw-inset-ring-shadow{syntax:"*";inherits:false;initial-value:0 0 #0000}@property --tw-ring-inset{syntax:"*";inherits:false}@property --tw-ring-offset-width{syntax:"";inherits:false;initial-value:0}@property --tw-ring-offset-color{syntax:"*";inherits:false;initial-value:#fff}@property --tw-ring-offset-shadow{syntax:"*";inherits:false;initial-value:0 0 #0000}@property --tw-outline-style{syntax:"*";inherits:false;initial-value:solid}@property --tw-blur{syntax:"*";inherits:false}@property --tw-brightness{syntax:"*";inherits:false}@property --tw-contrast{syntax:"*";inherits:false}@property --tw-grayscale{syntax:"*";inherits:false}@property --tw-hue-rotate{syntax:"*";inherits:false}@property --tw-invert{syntax:"*";inherits:false}@property --tw-opacity{syntax:"*";inherits:false}@property --tw-saturate{syntax:"*";inherits:false}@property --tw-sepia{syntax:"*";inherits:false}@property --tw-drop-shadow{syntax:"*";inherits:false}@property --tw-drop-shadow-color{syntax:"*";inherits:false}@property --tw-drop-shadow-alpha{syntax:"";inherits:false;initial-value:100%}@property --tw-drop-shadow-size{syntax:"*";inherits:false}@property --tw-backdrop-blur{syntax:"*";inherits:false}@property --tw-backdrop-brightness{syntax:"*";inherits:false}@property --tw-backdrop-contrast{syntax:"*";inherits:false}@property --tw-backdrop-grayscale{syntax:"*";inherits:false}@property --tw-backdrop-hue-rotate{syntax:"*";inherits:false}@property --tw-backdrop-invert{syntax:"*";inherits:false}@property --tw-backdrop-opacity{syntax:"*";inherits:false}@property --tw-backdrop-saturate{syntax:"*";inherits:false}@property --tw-backdrop-sepia{syntax:"*";inherits:false}@property --tw-duration{syntax:"*";inherits:false}@property --tw-ease{syntax:"*";inherits:false}@property --tw-scale-x{syntax:"*";inherits:false;initial-value:1}@property --tw-scale-y{syntax:"*";inherits:false;initial-value:1}@property --tw-scale-z{syntax:"*";inherits:false;initial-value:1}@keyframes pulse{50%{opacity:.5}}

In the Zenless Zone Zero Version 2.5 "Exclusive Rescreening" banner, Alice Thymefield Disorder

This guide explores her hidden mechanics, optimal rotations, and build strategies to help you master this "Solo Disorder" powerhouse.

English
Sign In / Register
keygold invite couponExclusive for New UsersRegister and receive a discount coupon
keygold homeHomekeygold arrow-rightBlogkeygold arrow-rightZZZ 2.5 Alice Thymefield Guide: Advanced Mechanics, Disorder Combos & Builds
keygold search

ZZZ 2.5 Alice Thymefield Guide: Advanced Mechanics, Disorder Combos & Builds

keygold blog authorJordan Taylor
2026/01/22
keygold facebook sharekeygold reddit sharekeygold twitter sharekeygold whatsapp share
keygold link

1. Core Mechanic: How Alice Triggers "Self-Disorder"

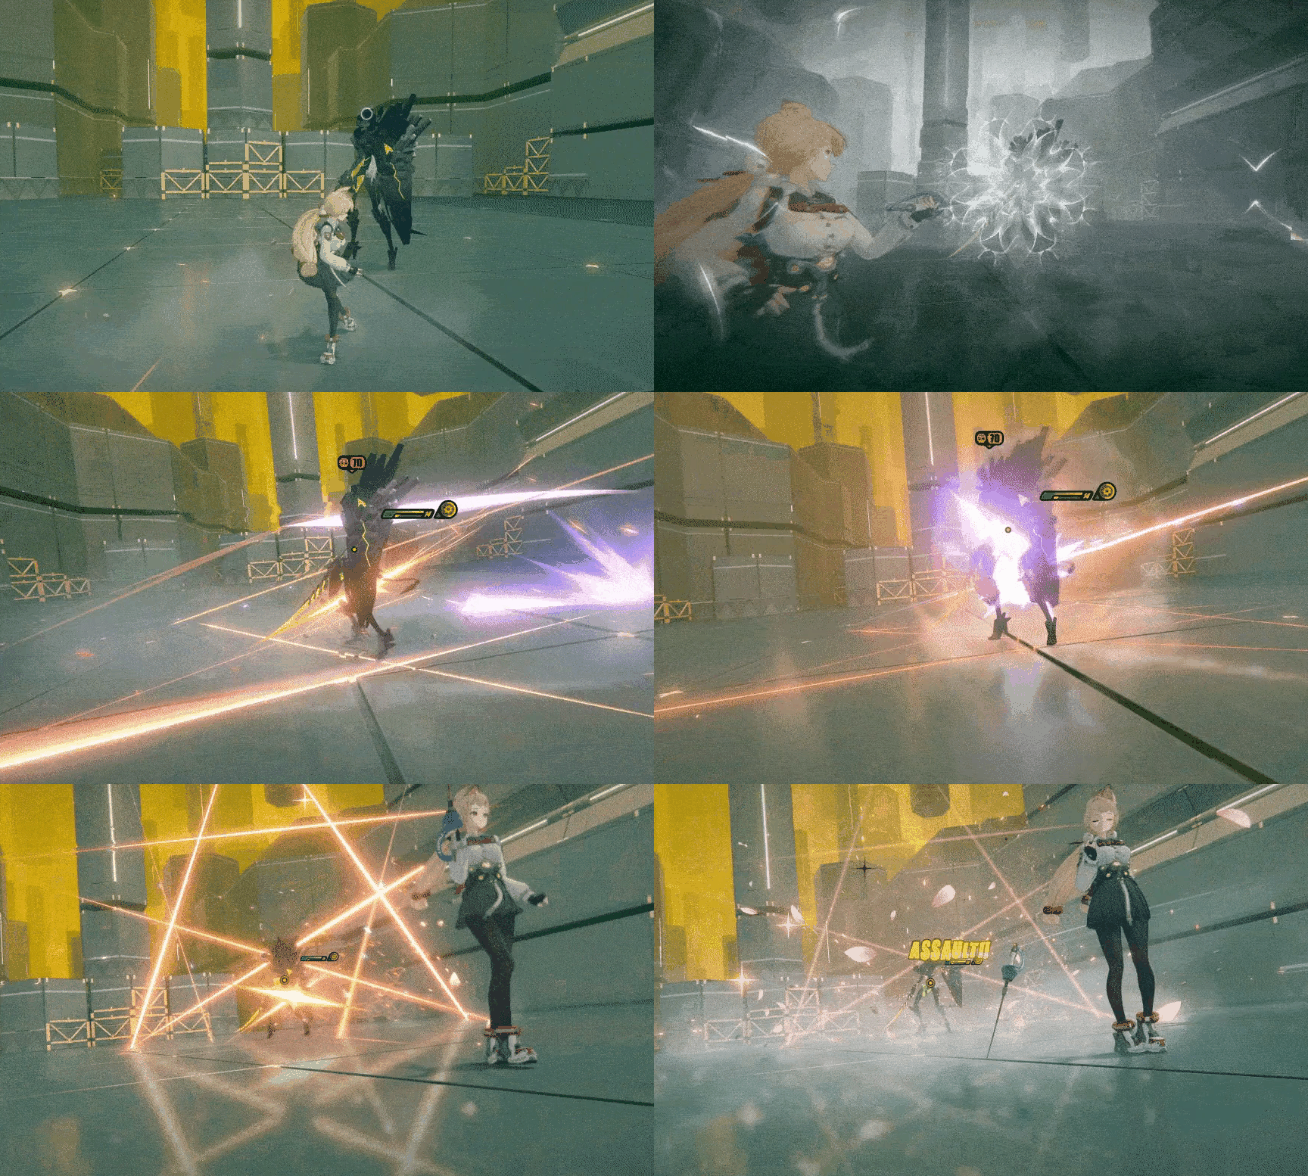
Standard Anomaly teams require two characters of different elements to trigger Disorder. Alice breaks this rule with two distinct types of Physical Anomaly effects:

  1. Assault: Triggered normally by building up the Physical Anomaly bar with Basic Attacks.

  2. Polarized Assault: Triggered by the final hit of her 3-stage charged Basic Attack, "Starshine Waltz", which consumes 3 bars of Blade Etiquette (the gauge under her HP bar).
    46.gif

The Strategy:

  • Polarized Assault acts as instantly filling an invisible Anomaly bar.

  • Triggering Polarized Assault within 10s of a standard Assault (or vice versa) triggers Disorder.

  • Key: You must alternate between these two types. Failing to alternate results in a massive loss of Disorder damage.

2. Advanced Combat Tips

1. Managing Anomaly Buildup:
  • At Mindscape 0 (M0) without her signature W-Engine, Alice's buildup rate is slow. Her "Blade Etiquette" often fills up faster than her Anomaly bar.

  • Tip: Do not unleash her 3-stage charge immediately if the Anomaly bar isn't full. Wait for the bar to fill first to ensure the Disorder proc isn't wasted.

2. EX Special Attack Tech 图片 :
  • Slow E (Neutral/Back input): Retreats with sword waves before dashing. Good for i-frames and safety.

  • Fast E (Forward input): Dashes forward instantly. Builds "Blade Etiquette" faster, ideal for burst windows during Stun.

3. The "5A" Loop:
  • Alice can chain into her 5th Basic Attack 图片 hit after almost any move (Special 图片 , Dodge Counter 图片 , Assist 图片 ).

  • Rotation: Quick Assist 图片 -> 5A 图片 -> EX Special 图片 -> 5A 图片 -> EX Special 图片 -> 5A 图片 -> 3-Stage Charge 图片 . This loop provides near-constant invulnerability frames.

4. Quick Swap Hazards:
  • Timing: Polarized Assault only triggers on the final hit of her charged attack. Swapping characters too early can trigger a Quick Assist that cancels Alice's attack animation, causing you to lose the damage. Wait for the Disorder damage number to appear before swapping back.

  • Off-field Limitation: Alice cannot trigger standard Assault while off-field. If you swap during her charged attack while the Anomaly bar is full, you might only trigger Polarized Assault, missing the Disorder window.

  • Solution:

    • Avoid swapping during her charged attack unless necessary.

    • Fill the Anomaly bar first, then release the 3-stage charge and swap.

    • Use a Physical teammate (like Yuzuha) to swap in and trigger the standard Assault during Alice's charge animation.

3. Best Builds & Teams

1. Equipment:
  • Drive Discs: 4-pc Fanged Metal 图片 + 2-pc Phaethon's Melody 图片 .

    • Stats: Slot 4 Anomaly Proficiency / Slot 5 Physical DMG / Slot 6 Anomaly Mastery (Essential).

  • W-Engines:

    • Best in Slot: Practiced Perfection (Signature) 图片 .

    • F2P Alternative: Weeping Gemini 图片 . Alice stacks its passive very quickly due to her dual Anomaly types.

2. Team Comps:
  • Best Partner: Yuzuha (Ukinami Yuzuha) 图片 .

    • Yuzuha provides essential Anomaly Buildup Efficiency buffs. For an M0 Alice, having either Yuzuha or Alice's signature W-Engine is almost mandatory to maintain the Disorder rotation efficiently.

  • Team: Alice 图片 + Yuzuha 图片 + Support/Anomaly Flex.

Conclusion: Alice Thymefield is a future-proof character with a high skill ceiling. While she demands investment (Signature W-Engine or Yuzuha), pulling her in the Version 2.5 Exclusive Rescreening is a low-risk, high-reward choice for any Proxy looking to dominate with Physical Anomaly.