BlogZZZ 2.7 Nangong Yu Advanced Guide: I-Frames, Precise Charging & Best Builds
ZZZ 2.7 Nangong Yu Advanced Guide: I-Frames, Precise Charging & Best Builds
 Peyton Harris


Advanced Mechanics: I-Frames & Precise Charging
Nangong Yu's Basic Attack combo is not just visually stunning; it offers incredible survivability and interruption resistance.
Invincibility Frames (I-Frames) During Charged Attacks
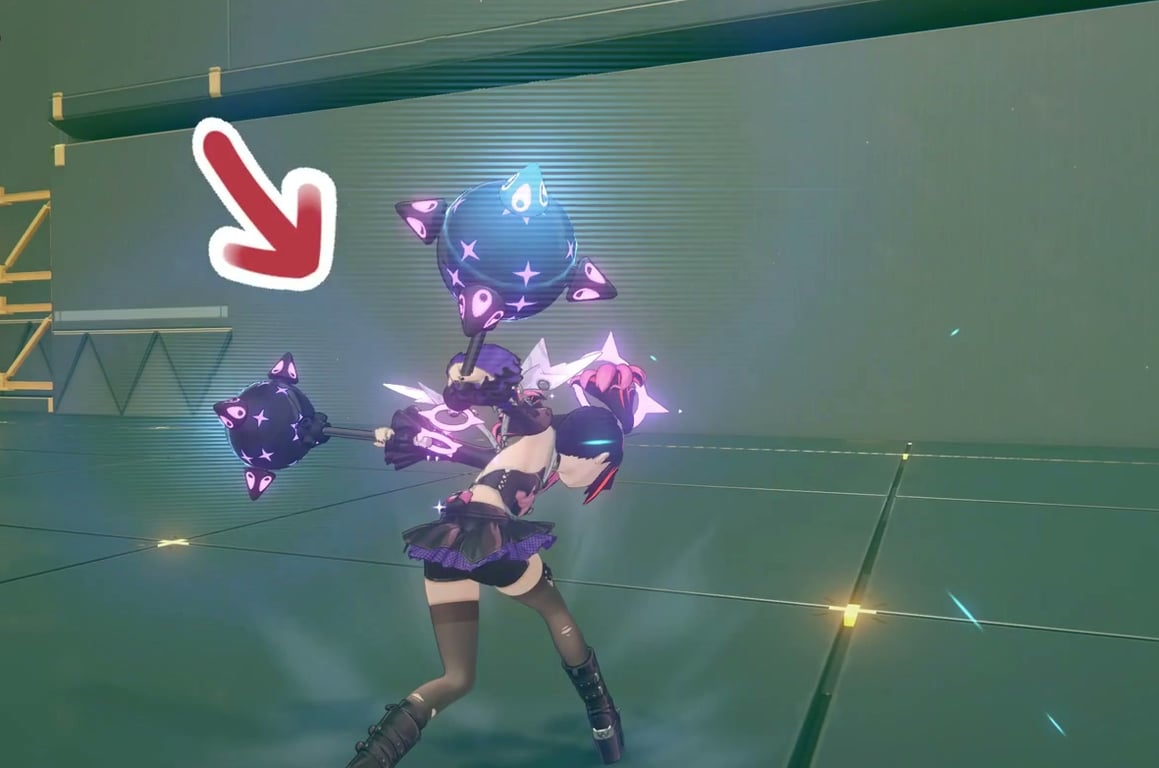
When Nangong Yu has enough Downbeats (her exclusive resource bar under her avatar, capping at 100), she can hold down the Basic Attack button to unleash a powerful multi-hit charged combo.
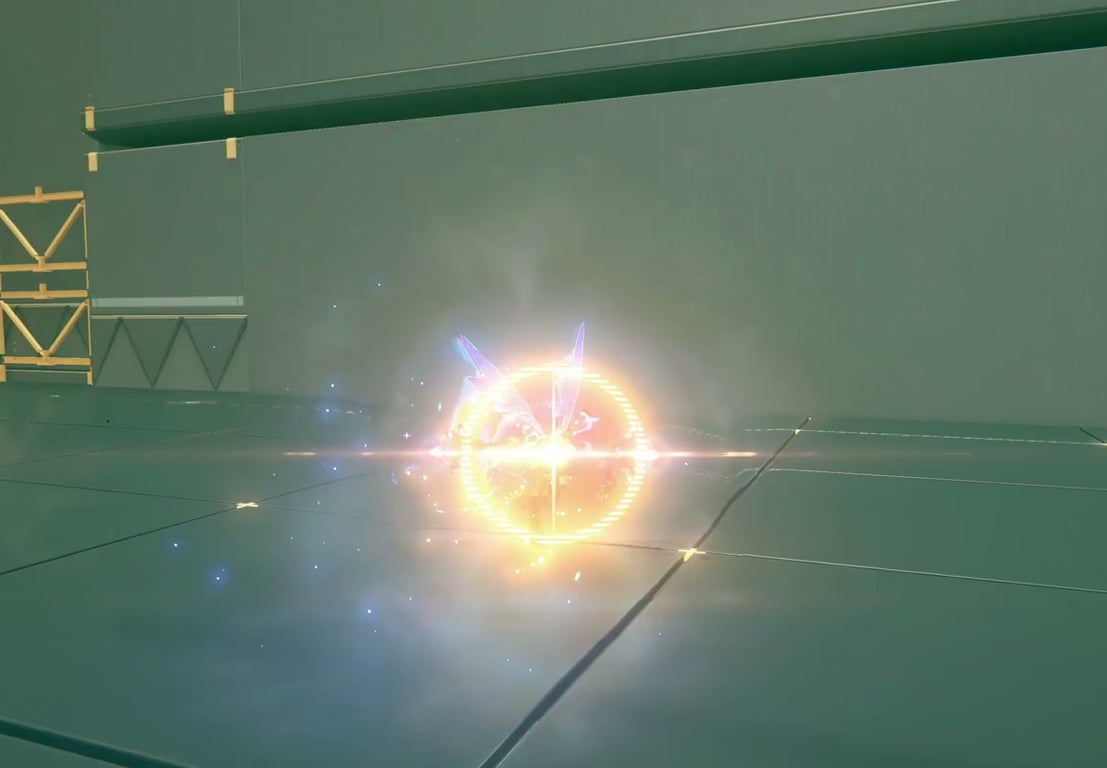
1st Hit Charge: While charging, she gains a 60% DMG reduction and increased Anti-Interrupt. Upon releasing the button to dash forward, the attack gains a Block property. If you release the button right when you see an enemy's attack flash, you will successfully Block, completely evading all damage (i-frame), and the attack will automatically count as Precise Charging.
2nd & 3rd Hit Charge: While consuming Downbeats to perform the subsequent charged attacks, Nangong Yu is completely invincible. This can be used strategically in combat to dodge lethal enemy attacks.
How to Trigger "Precise Charging"
Triggering Precise Charging increases the Daze dealt by the skill by an additional 20%, which is crucial for maximizing her Stun efficiency.
Manual Timing: For the 1st hit, release the button the moment Nangong Yu pulls her hammer behind her back. For the 2nd and 3rd hits, release the button just as she spins the hammer. A successful attempt will emit a yellow flash effect.
Auto-Trigger (Highly Recommended): If you hold the Basic Attack button immediately after using an
EX Special Attack,
Chain Attack, or
Ultimate (provided you have enough Downbeats), she will automatically skip the first hit, chain into the 2nd and 3rd hits, and guarantee Precise Charging. This is the safest and most efficient way to maximize her Daze output without risking manual timing errors.
Map Traversal Speed Trick
While exploring the overworld, Nangong Yu's dash attack (a forward hammer swing) covers a lot of ground. By repeatedly pressing Basic Attack +
Dodge, you can use the dodge to cancel the recovery animation of her dash attack. This results in an incredibly smooth and fast traversal method that is noticeably faster than standard continuous sprinting.
Combat Easter Eggs: The Idol Stage
As an idol group, HoYoverse has packed their animations with fun easter eggs. As long as you have Angels of Delusion faction members in your squad, you can trigger exclusive interactions (non-faction members will not participate):
Invincible Idle Dance: In both town and combat environments, if your active character is an Angels of Delusion member and enters their idle animation, the other faction members in your squad will appear and dance together, with the active character always taking the Center (C-position). More importantly, if this dance is triggered during combat, the characters gain full invincibility! As long as you do not manually interrupt the animation, enemy attacks will not stagger you or deal any damage.
Lying on the Floor: During combat, when Nangong Yu executes her 3rd Charged Basic Attack (Downward Smash), she will hit the ground and drag the other Angels of Delusion members down to lie on the floor with her. The visual order of the characters from left to right is fixed (Sunna, Nangong Yu, Aria).
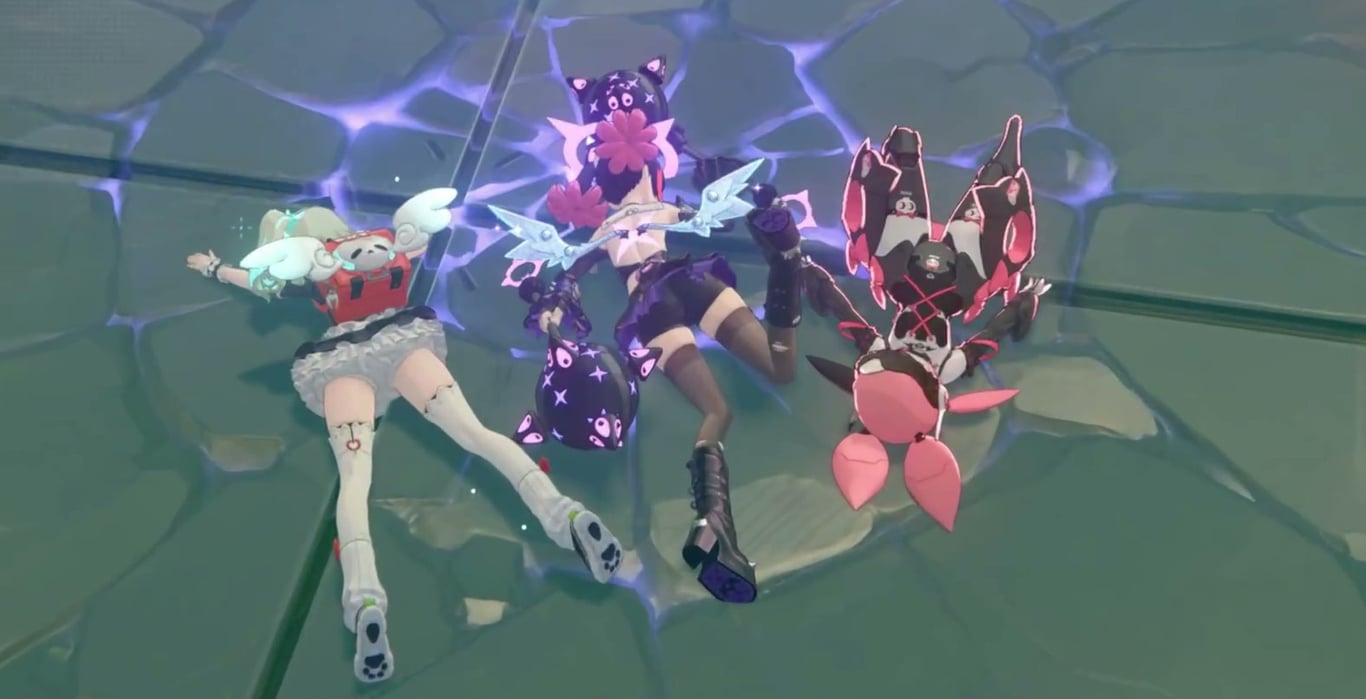
During both the dance and the floor-lying animations, you can seamlessly switch characters, and the character you switch to will remain on the field to continue the animation. Note that the character swapping order strictly follows your Squad Order set in the team setup menu, completely ignoring their visual placement on the screen.
Core Buffs & Mechanics Clarification
To maximize Nangong Yu's potential, it is important to understand her actual buffs and burst mechanics:
Permanent Buffs & "Vibrato" Abloom
When Nangong Yu's EX Special Attack or
Basic Attack: Adorable Explosive Impact hits an enemy, she boosts the entire squad's DMG by 25% for 30s, while increasing her own Anomaly Buildup Rate by 35% and Daze dealt by 20%. When an enemy is Stunned, teammates triggering Anomalies or Abloom will grant Nangong Yu stacks of Vibrato (up to 4). Once the Stun ends or the stacks reach maximum, they are cleared, triggering a massive Abloom nuke.
Advanced Mechanics: Polarity Disorder & Stun DMG Multiplier
It's crucial to clarify that Polarity Disorder and her extra Stun DMG multiplier are not part of her base kit—they are unlocked via Mindscape Cinema. Unlocking Mindscape 2 (Painless Tears) increases her Stun DMG multiplier by 30% and allows her Heavy Attacks to trigger Polarity Disorder on Stunned enemies affected by an Anomaly. A Mindscape 0 Nangong Yu relies purely on her Vibrato for burst damage.
Best Builds & Team Compositions
Recommended W-Engines
Best Choice: Signature W-Engine
Neon Fantasies (provides massive Anomaly Mastery and teamwide DMG buffs).
Alternatives: If you don't have her signature, standard 5-star Stun W-Engines like
Hellfire Gears or
The Restrained are solid choices to maintain high Stun efficiency. Other 4-star Stun W-Engines also perform adequately.
Drive Disc Recommendations
4-Piece Set:
Shining Aria (Perfectly matches her Anomaly Proficiency needs and provides a 25% DMG boost during Stun windows).
2-Piece Set:
Phaethon's Melody or any set providing Anomaly Mastery.
Main Stats: Partition 4: Anomaly Proficiency / Partition 5: Ether DMG Bonus / Partition 6: Anomaly Mastery (Thanks to her
Core Passive: Prodigious Idol, excess Anomaly Mastery seamlessly converts into Impact).
Team Compositions
Aside from the dedicated Angels of Delusion team (Nangong Yu +
Aria +
Sunna), Nangong Yu fits flawlessly into almost any Anomaly DPS team. For example, paired with
Miyabi, Nangong Yu not only provides rapid Stuns but also helps Miyabi quickly accumulate her exclusive resources. When paired with Anomaly DPS characters like
Alice or
Yanagi, she offers top-tier Stun efficiency and teamwide amplification.
- All-In-One Bundle$160.8-$40.14$200.94
- Inter-Knot Membership$3.6-$1.39$4.99
- 60 Monochrome$0.71-$0.28$0.99
- 300+30 Monochrome$3.6-$1.39$4.99
- 980+110 Monochrome$10.83-$4.16$14.99
- 1980+260 Monochrome$21.67-$8.32$29.99
- 3280+600 Monochrome$36.12-$13.87$49.99
- 6480+1600 Monochrome$74.99-$25$99.99
- 6480+1600 Monochrome*3$244.97-$55$299.97
- 6480+1600 Monochrome*5$414.96-$84.99$499.95
- 6480+1600 Monochrome*10$839.92-$159.98$999.9