Headshot Rate Stuck at 40%? 3 Key Mechanics That Can Push You Toward 70%
 Quinn Thompson


Many players in Free Fire get stuck at a 35–45% headshot rate and assume the problem is aim. In reality, headshot consistency is shaped by recoil patterns, engagement distance, and pre-aim discipline. This guide breaks down the 3 core mechanics that separate 40% players from 70% performers.
If your headshot rate in Free Fire feels permanently stuck around 35–45%, you’re not alone. A lot of mechanically decent players plateau there and assume the solution is simple: better aim, more practice, more sensitivity tweaking.
But here’s the uncomfortable truth:
In Free Fire, headshot rate is less about raw aim — and more about understanding how the system actually works.
Before we talk about improvement, we need to clear up a few myths.
Is Headshot Rate Really Equal to Skill?
A high headshot percentage looks impressive. It makes for great thumbnails. It sounds like hard proof of mechanical dominance.
But statistically and structurally, it doesn’t always mean what people think it means.
High Headshot % ≠ High KD
A player who takes mostly short-range fights with SMGs or shotguns will naturally land more head-level eliminations. Their engagement profile inflates their percentage.
Meanwhile, someone who plays mid-range AR control or long-range beam fights may have a lower headshot rate — but better overall damage efficiency and survival value.
Headshot rate is shaped by:
Engagement distance
Weapon category
Fight duration
Enemy armor state
It’s a structural stat, not just a precision stat.
High Headshot % ≠ High Win Rate
Winning in Free Fire depends on:
Positioning
Third-party timing
Resource management
Zone decisions
You can have a flashy 75% headshot rate and still lose late game because your macro decisions are weak.
“90% Headshot” Often Reflects Kill Structure
If most of your eliminations happen:
In close quarters
Against weak or rotating enemies
In low-pressure scenarios
Your percentage will look elite.
If you frequently take chaotic mid-range trades or suppressive fights, your percentage will drop — even if your mechanics are solid.
That’s why improving headshot rate isn’t about forcing headshots.
It’s about understanding what actually controls the number.
What Actually Determines Headshot Rate in Free Fire?
This is where the real leverage is. There are five system-level factors that matter more than raw aim.
1. Recoil Curve Behavior
Most automatic weapons in Free Fire share a common pattern:
First 3–5 bullets: relatively stable
Sustained fire: noticeable vertical climb
This changes how you should think about aiming.
Instead of dragging your crosshair to the head and spraying downward, optimal players:
Pre-aim upper chest
Fire short 2–3 round bursts
Let recoil naturally climb into the head
In other words:
Burst control + vertical recoil exploitation beats full spray tracking.
Headshots are often a byproduct of recoil behavior — not pixel-perfect tracking.
2. Aim Assist & Magnetism Windows
Free Fire has noticeable aim assist characteristics, especially:
Mid-close range
At ADS (aim-down-sight) initiation
The key insight:
You don’t snap directly to the forehead.
You snap to upper torso and allow micro recoil lift + aim assist stabilization to finish the adjustment.
Over-pulling to the head often destabilizes the aim box.
Under-pulling and letting the system assist upward movement creates more consistent results.
This is a mechanics alignment issue, not a reflex issue.
3. Short TTK Changes Everything
Free Fire has relatively fast time-to-kill in close to mid engagements.
That means:
You don’t get many correction opportunities.
First-shot placement matters disproportionately.
Headshot rate = pre-aim quality × first bullet placement.
Players stuck at 40% often rely on reactive correction (dragging after firing).
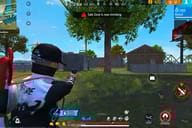
Players above 65% rely on predictive pre-alignment before firing. That same principle becomes even clearer in close-range duels, where reaction timing often matters more than raw spray control.
You win headshot consistency before the trigger is pulled.
4. Skill Loadout and Stability Buffs
Headshot consistency is partially a configuration problem.
Skills that affect:
Accuracy
Recoil control
Movement shooting stability
ADS handling
Indirectly increase head-level consistency.
If your loadout increases spray instability, your ceiling is mechanically capped.
Serious players treat headshot rate as:
Mechanics × Configuration synergy.
Many players underestimate how much their configuration limits their potential. Even strong crosshair discipline can break down if recoil recovery or ADS stabilization is inconsistent.
Certain character combinations, pet skills, and weapon upgrades provide:
Better recoil control
Faster ADS stabilization
Improved movement shooting accuracy
These advantages don’t automatically create headshots — but they make upper-torso pre-aim and burst discipline far more reliable.
If you're serious about pushing toward a 70% headshot rate, unlocking and optimizing the right setup matters. Players who haven’t unlocked key characters or upgrades yet sometimes use Free Fire top up options to accelerate access to stronger loadouts — but configuration should be viewed as support, not a shortcut.
Mechanics still win fights. Configuration simply raises your consistency floor.
5. Distance Management
This is the most underrated factor.
Players with high headshot rates:
Avoid 60–80m extended AR trades
Limit chaotic suppression fights
Prefer 10–25m controlled engagements
Why?
Because this is the range window where:
Recoil lift is predictable
Aim assist is strongest
Burst windows are optimal
Correction time still exists
Headshot rate is often a distance management skill disguised as an aim skill.
The 3-Step Structure High-Level Players Use
Now let’s compress everything into a repeatable model.
Step 1: Pre-Aim Upper Chest, Not Head
Don’t chase the skull.
Place your crosshair slightly above center mass before engagement. This maximizes recoil conversion into head contact.
Step 2: Fire in Controlled Micro-Bursts
2–3 rounds. Reset. Re-engage.
Full sprays reduce headshot consistency because vertical climb overshoots once stabilization ends.
Short bursts create repeatable head-level alignment.
Step 3: Choose Fights That Favor Headshots
This is the real separator.
High headshot players:
Don’t take unnecessary long-range chip fights
Don’t ego-trade across open fields
Collapse into optimal distance windows
Headshot rate rises when fight selection improves.
The Real Upgrade
Most players think:
“I need better aim to increase headshots.”
The actual upgrade is:
“I need better engagement control.”
High headshot rate is not about being mechanically gifted.
It’s about:
Pre-fight positioning
Distance filtering
Burst discipline
Loadout synergy
And here’s the uncomfortable discussion starter:
Many “90% headshot” showcases reflect selective fight structures or lower-intensity lobbies — not raw aim superiority.
If you want to push past 40%, don’t grind sensitivity.
Refine:
Your pre-aim discipline
Your burst control
Your distance selection
Because in Free Fire:
Headshot consistency is a systems problem — not a talent problem.


- 100+10 Diamonds$0.82-$0.15$0.97
- 310+31 Diamonds$2.46-$0.43$2.9
- 520+52 Diamonds$4.11-$0.73$4.84
- 1060+106 Diamonds$7.81-$1.38$9.19
- 2180+218 Diamonds$15.56-$2.75$18.31
- 5600+560 Diamonds$39.09-$6.9$45.99
- Weekly Membership$1.79-$0.32$2.11
- Monthly Membership$8.61-$1.52$10.13
- Booyah Pass card$3.18-$0.56$3.74
- Weekly Lite$0.42-$0.07$0.5
- Jovial Symphony King Bundle$4.56-$0.8$5.36
- Queen Joyful Melody Bundle$4.56-$0.8$5.36