Free Fire Safe Zone Prediction and Rotation Planning
 Quinn Thompson


This article explains how skilled Free Fire players use the first safe zone to predict match flow and build stronger rotation routes. It covers how to read early circle placement, choose flexible positions, plan for later zones, and avoid common rotation mistakes in ranked play.
In Free Fire, most players don’t lose because they can’t shoot. They lose because they arrive late, rotate blind, or walk into the wrong side of the next zone with no cover and three teams already set up. If you want more consistent top finishes, the first safe zone is not just information on your map. It is the starting point for your entire rotation plan, and our survival guide gives the bigger picture from early drop decisions all the way to the final circle.
A good player sees the first circle and asks one question immediately: What kind of match is this likely to become? Once you can answer that fast, your route, timing, loot priorities, and vehicle decisions all get easier.
Why the First Circle Matters
The first shrink does more than tell you where to go. It reveals the likely pace of the match.
If the first circle pulls hard toward one edge of the map, you can expect long rotations, more gatekeeping, and more pressure on teams coming from the dead side. If it lands near the center, the lobby usually compresses slower, which creates more choices but also more unpredictable third parties. The first circle gives you the earliest read on where traffic will form and which compounds will become priority positions.
What the first zone tells you
Which side of the map will get crowded
Teams outside the early circle usually funnel through the same roads, ridgelines, bridges, and choke points. Your route should avoid the most obvious traffic whenever possible.
Whether you need a fast or layered rotate
Sometimes the correct play is to move early and claim space. Other times, rotating too early exposes you to every team still looting behind you. Your first-circle read helps decide whether you should sprint into zone or take a more controlled path with a stop in between.
What kind of endgame terrain is likely
A first zone that favors urban areas plays very differently from one that trends toward open hills, water edges, or broken terrain. Strong players don’t just rotate into the next safe zone. They rotate toward the kind of final fight they want.
How Better Players Read the First Circle
A lot of players look at the safe zone and only think in terms of distance. Competitive players think in terms of space, access, and survivability.
Start with your drop
If you land near the center
You have more options, but that does not mean you should stand still. Use your early freedom to take a position that keeps multiple second-zone outcomes playable. A central compound with several exits is often stronger than flashy high ground with one terrible escape.
If you land on the edge
You need to think one zone ahead right away. Edge drops are good for loot and lower contest risk, but they often force predictable rotations. If you start far from zone, build a route that gives you at least one fallback point before you commit.
If you land deep outside the first circle
The match becomes a timing problem. Your route matters more than perfect loot. One of the biggest mistakes here is over-looting and leaving late without a vehicle, utility, or control over your angle of entry.
Read the map in layers
A bad rotation plan is just a straight line from your current position to the circle. A good one has stages.
Layer 1: Exit your drop safely
Leave your starting area without exposing yourself to the nearest common rotation lane.
Layer 2: Enter playable space
Move into an area where you can stop, scout, heal, and re-evaluate if the next circle breaks badly.
Layer 3: Fight for future priority
Only after you stabilize should you push for premium terrain or the strongest compound nearby.
This is the difference between a smooth rotate and a panic rotate. You are not just getting into zone. You are moving from one controllable part of the map to the next.
Planning Rotations for the Mid Game
Once you read the first circle properly, the next step is planning the rest of the match before it fully unfolds.
Think about the second zone before it appears
You do not need to predict the exact next circle. You just need to predict the most likely pull directions and place yourself where several outcomes remain playable.
Choose spots with flexible exits
A compound with two or three clean rotation paths is more valuable than a “perfect” spot that becomes a death trap when the next zone shifts away.
Don’t anchor too hard too early
A lot of players die because they lock themselves into a strong-looking position that only works for one circle outcome. If the zone moves and your only exit is downhill into open ground, you were never really in control.
Decide whether you are playing edge or priority
Priority rotation
This means moving early to secure strong space before the lobby collapses. It works best when you are already close to zone, looted enough to fight, and confident about which compounds or ridges will matter later.
Edge rotation
This means moving along the outer side of zone, clearing your back, and entering later from a safer angle. It works best when your drop is far, your loot path is slower, or the center is too exposed.
Vehicles and resources still matter
Vehicles are not just for speed. They are rotation insurance. A vehicle lets you skip dead ground, reroute around gatekeepers, and beat slower teams to staging areas. But driving straight into zone without scouting is how squads get deleted.
This is also where broader match prep starts to matter more than people admit. Players who stay active in the game’s economy, whether that means keeping up with event rewards or handling a Free Fire top up when they need access to specific utility-focused bundles, often end up better equipped for long sessions of ranked grinding. That does not replace game sense, obviously, but consistent preparation helps when you are practicing rotations, testing loadouts, and trying to play cleaner in pressure zones.
Use staging points
A staging point is a temporary hold that helps you transition into the next phase of the match. It should give you hard cover, vision on nearby traffic, a safe reset window, and at least one alternate exit.
Instead of forcing your whole rotation in one move, go from drop spot to staging point, then staging point to zone control, then zone control to endgame adjustment. That rhythm keeps your decisions clean and reduces panic.
Common Rotation Mistakes
The biggest difference between average players and serious grinders is not mechanics. It is how quickly they stop making the same map mistakes.
Over-looting after a bad first circle
If the zone is far and your bag is still half-empty, discipline matters. A weaker loadout inside zone is usually better than a perfect loadout that arrives through six teams and no cover.
Rotating through the middle for no reason
Center routes can be powerful, but only if you move with timing and information. Walking through the middle just because it looks shortest is one of the easiest ways to get pinched.
Taking the first safe building you see
Not every building inside zone is actually playable. Some compounds become traps the moment the next circle shifts. Before you commit, ask whether that spot has exits, sightlines, and protection from multiple angles.
Ignoring terrain shape
Open ground is never just open ground. Small ridges, broken rocks, elevation cuts, and tree density all change whether a rotation is viable. Better players read micro-cover constantly, especially when moving from first zone into second.
Fighting the wrong battle
The first-circle phase often baits players into unnecessary fights. If your path to zone is already difficult, adding a long 50-50 fight usually ruins your match, which is exactly why our mid-range gunfights breakdown is worth reading too. Top players know when to shoot for control and when to save resources for a better moment later.
What experienced players do differently
They rotate with intent
Every move supports a later move.
They preserve options
They do not trap themselves in one-circle logic.
They value timing as much as aim
Getting to the right place ten seconds early can matter more than winning a flashy duel.
They update the plan constantly
The first circle gives the blueprint, but every sound cue, knock feed, vehicle path, and next-zone shift can change the details.
The players who survive more and convert more wins are usually not guessing better in the last circle. They made better decisions from the first one, and our final circle psychology guide explains how calm decision-making becomes even more important once the lobby gets thin. Read the zone early, build your route in layers, and rotate with purpose.


- 100+10 Diamonds$0.82-$0.15$0.97
- 310+31 Diamonds$2.46-$0.43$2.9
- 520+52 Diamonds$4.11-$0.73$4.84
- 1060+106 Diamonds$7.81-$1.38$9.19
- 2180+218 Diamonds$15.56-$2.75$18.31
- 5600+560 Diamonds$39.09-$6.9$45.99
- Weekly Membership$1.79-$0.32$2.11
- Monthly Membership$8.61-$1.52$10.13
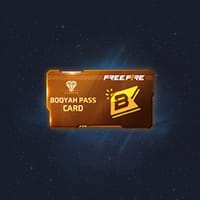
- Booyah Pass card$3.18-$0.56$3.74
- Weekly Lite$0.42-$0.07$0.5
- Jovial Symphony King Bundle$4.56-$0.8$5.36
- Queen Joyful Melody Bundle$4.56-$0.8$5.36