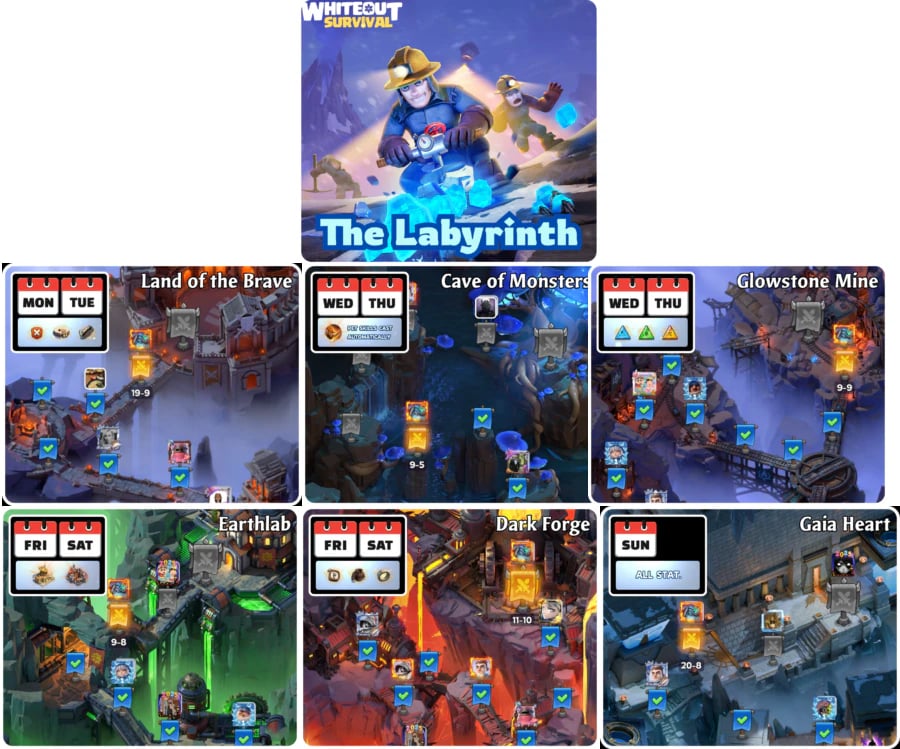
ホワイトアウト・サバイバル|ラビリンス Gaia Heart 攻略編成ガイド
 佐藤 悠真
佐藤 悠真


Gaia Heart(ラビリンス)で進行が止まっている方向けに、編成ロジックとダメージ分散の考え方を整理。火力ではなく「構成」が原因の場合に有効な安定編成の基準を解説します。
ホワイトアウト・サバイバルのラビリンスにおいて、Gaia Heart は多くのプレイヤーが一度は足止めされる代表的な関門です。
しかしその原因は、単純な戦力不足ではありません。
このステージが厄介なのは、編成ロジックの小さなミスを容赦なく拡大して罰してくる点にあります。
「ヒーローが十分に育っていれば、いずれ突破できるはず」と考えるプレイヤーも多いですが、実際の Gaia Heart は非常にシビアです。
兵種バランスや配置のわずかなズレが、戦闘全体の崩壊につながることも珍しくありません。
本ガイドは「確定クリア編成」を約束するものではありません。
あくまで、詰まりやすいプレイヤーが突破口を見つけるための、安定性重視のベース編成を提示し、
同時に「なぜ詰まっているのか」を理解する手助けを目的としています。
なぜ Gaia Heart はこれほど厳しく感じるのか
Gaia Heart は、単なる戦力チェックではありません。
編成構造とダメージ分散の理解度を試すステージです。
このステージでは、以下の 3 点が同時に試されます。
・混合ダメージを受け続ける前衛の耐久力
・瞬間的な圧力に耐える中列の安定性
・過度に狙われず、火力を出し続けられる後列の維持力
どこか一列でも早期に崩れると、戦況は一気に悪化します。
そのため、同程度のヒーローや戦力を持っていても、結果に大きな差が出るのです。
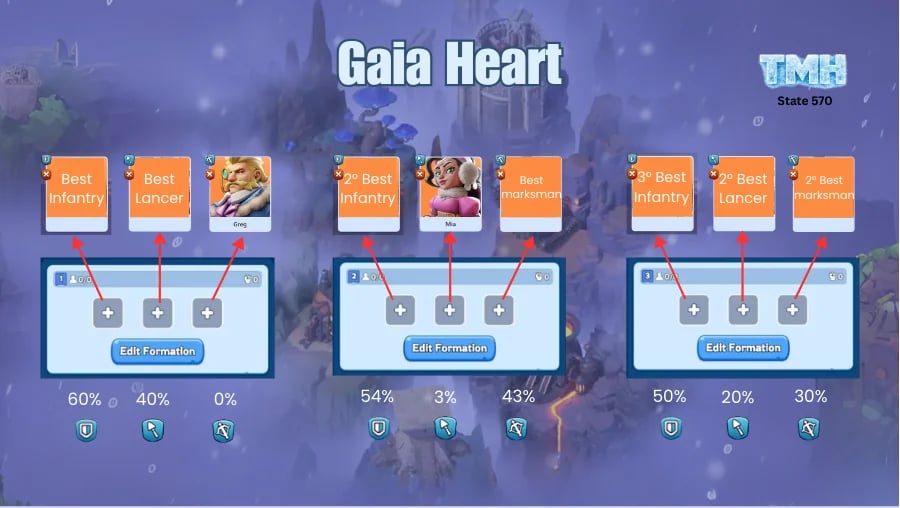
Gaia Heart 向けの安定したベース編成
以下の編成は万能ではありませんが、
「ヒーロー不足ではなく、編成構造が原因で詰まっている」プレイヤーにとって、非常に有効な出発点になります。
推奨編成構造
前列:最強の歩兵 + 最強のランサー
中列:最強の歩兵 + 最強のマークスマン
後列:最強の歩兵 + 最強のランサー + 最強のマークスマン
この構成は、瞬間火力ではなく、ダメージ吸収と分散を重視しています。
目的は、どこか一列だけが早期に崩壊する事態を防ぐことです。
なぜこの編成が機能するのか
・歩兵を複数列に配置することで、リスクを一点集中させない
・ランサーの圧力を分散し、被ダメージの偏りを抑える
・マークスマンが序盤で落ちにくくなり、継続火力を確保できる
実際、多くのプレイヤーが
「編成ロジックを修正しただけで、今まで不可能だった戦闘が安定した」
と感じています。
この編成が特に有効なプレイヤー層
この構成は、特に以下の条件に当てはまる場合に効果を発揮しやすいです。
・ラビリンスの序盤〜中盤世代を進行中のプレイヤー
・戦闘が本格化する前に負けてしまうケースが多い
・前衛が中盤まで持たずに崩壊してしまう状況
もしラビリンスの後半世代に到達している場合、
スケーリングの影響により、正しい編成でも追加の耐久調整や効率改善が必要になることがあります。
勝つ前に分かる「正しい方向に進んでいるサイン」
完全クリアできなくても、方向性が合っているかは判断できます。
・前衛が戦闘中盤まで生存している
・ダメージが途中から伸び、急激に失速しない
・負け方が「一方的」ではなく「惜敗」に近い
もし中盤以前に前衛が崩れる場合、
問題は兵種比率ではなく、ラビリンスのスケーリングに対する実質耐久力であることが多いです。
この違いを理解することで、
同じ編成でも「通る人」と「通らない人」が出る理由が見えてきます。
効率・進行・長期視点について
ある段階から、Gaia Heart は力押しではなく
1 回あたりの挑戦効率が重要になってきます。
ローテーションを見直して慎重に進む人もいれば、
リソース管理や ホワイトアウト・サバイバル 課金(チャージ)などを活用し、
無駄な挑戦を減らして時間効率を守る人もいます。
どちらが正解というわけではありません。
大切なのは、「編成の問題が終わり、スケーリングの問題に入った瞬間」を見極めることです。
まとめ
Gaia Heart は、偶然で突破できるステージではありません。
編成理解・ダメージの流れ・耐久配分を理解したプレイヤーに報いる設計になっています。
このガイドは「答え」ではなく、「基準」を提示するものです。
すぐに機能すれば理想的ですし、
そうでなくても「なぜ機能しないのか」を理解する助けになります。
ホワイトアウト・サバイバルのラビリンスにおいて、
理解こそが最大の突破口になる場面は少なくありません。


- どれでも 0.99 パック$0.76-$0.23$0.99
- どれでも 1.99 パック$1.49-$0.5$1.99
- どれでも 2.99 パック$2.24-$0.75$2.99
- どれでも 3.99 パック$2.98-$1.01$3.99
- どれでも 4.99 パック$3.73-$1.26$4.99
- どれでも 9.99 パック$7.47-$2.52$9.99
- どれでも 19.99 パック$14.95-$5.04$19.99
- どれでも 49.99 パック$37.39-$12.6$49.99
- どれでも 99.99 パック$77.99-$22$99.99
- スタンダードパック全集$152.76-$32.19$184.95
- 英雄殿堂 - 英勇の証コンプリートパック$152.76-$32.19$184.95
- アイスフィッシングクラブ - フィッシングプロ&マスター$11.2-$3.78$14.98
- フィッシングプロセット オールインワン$181.75-$36.15$217.9
- ラッキーチップパックオールインワン$66.52-$20.43$86.95
- 秘宝鍵石パックセット$156.26-$32.67$188.93
- 万象バザール・オールインワンパック$332.24-$56.67$388.91
- どれでも 499.99 パック$429.99-$70$499.99
- どれでも 999.99 パック$869.99-$130$999.99